What you need to know about the Park
 The Petrified Forest is in Northern Arizona and the terrain is high plateau which means it is and elevated flat land above the deserts of Arizona. The Arizona Plateau elevation is mainly above 5000 feet which means it can be hot or cold. The Petrified Forest is not located in the mountainous portion like Flagstaff which means it is very flat. While the name implies a forest there are actually very few trees in this area and most of the plants are less then knee high and are thin and sparse. This means you have the rocks and or petrified logs as your main subject which is why you are there in the first place so this works out. One problem you have with this particular National Park is timing. This park closes early sometimes even before sunset and the rangers drive the roads to kick everyone they find out. If you want sunset pictures I highly suggest late fall to December as the park is open during to sunset times. Do not go January to March if you want to see the sunset. My visit was a spur of the moment and I was kicked over an hour before sunset.
Petrified Pitfalls
Landscapes are all about composition and there are many facets that you must be aware of for an image to capture what caught you eye. Many times, I have been in a landscape that took my breath away so I took a picture only to find when I get home that it didn’t really show what wowed me. This is often because of the massiveness of the landscape. When you are there in real life you are able to take in the whole thing and be apart of it. Your eye can see every small part with full detail and your brain can put together the whole image from the small flower in front of you to the far mountains and the clouds in the sky. It also adds in your peripheral vision. Your camera has many more limitations than your eyes and brain do. The closest your camera can do would be stitching a panorama in Photoshop. This is why panoramas are so common in landscapes. However, even with panoramas they don’t always give you that feeling of being there and they often make the vertical elements in your image small and flat as well as the making the distant objects to small to really hold any interest. This is even more true for you viewers who are seeing the image on their computer screen.
Take the panorama example on the left. The landscape is so big that you can’t capture it in one shot so you have to stitch the image together to capture what makes it impressive. However when viewed small like on your computer this image doesn’t show much detail vertically which makes it less impressive and you can barley see the large canyon in the image. Now if you print it so the vertical is at least 16 inches you can see all the detail and then the canyon feels like you are looking over the ledge. Print it big enough and you might feel like you could fall over the ledge. The second problem panorama have is they lose the depth in the image. This is true with every image because the world is 3-dimensional and images are 2-dimensional . This is why composition is so important. Composition can help add depth or other interests such as color, shapes or texture.
Petrified Composition
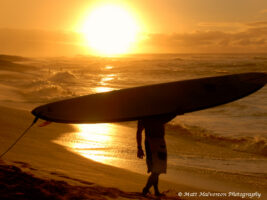
 So now you know all the difficult parts of shooting in the park. Now I will give you some composition ideas to help you come away with “keepers”. As with most photography when you take your picture first take a moment and decide why you wanted to take the picture. Are you trying to tell a story or shot something interesting to your viewer? If so make sure that stands out in your image. Take for example the image here with the large petrified logs. What drew me to take the picture was that these large petrified logs were just layering around without anything around. So to compose this shot I thought to myself how can I show the logs laying in their environment in a way that the environment and logs are balanced as interest to the viewer. I put the logs in the front of the image to draw attention to them and help give the viewer the feeling of standing there. What caught my drew me to to take the photo at the top of this post was the golden color of the logs. Again I place a couple of larger ones in the foreground to grab attention and give the view a starting point. Then I chose a direction that would also show golden logs in the background. The third thing that made this place interesting was the depth of the canyon. As I mentioned at the beginning of the post depth is difficult to show in 2-dimensional. The only way to show depth in a picture is with lines so I looked for a log that had good lines near it that would span from the foreground into the background. Again this log fit the bill. Also having something interesting in the foreground will help to add depth in the image. The last problem I had to over come was shooting during the day rather than sunset. Under the direct sunlight of mid-day the sky is often dull and without color. To help bring out some color in the sky I used CPL filter which deepens the blues in the sky.
  I also used the softness of the clouds as a contrast to the textures in the rocks. Now compare the top image with the one at the left here. This one I wanted to show the depth of the canyon so I took a side view of the canyon and used the lines running down the canyon to add vertical depth rather then horizontal depth. Again I used the rock in the front of the image to make the viewer feel like they are standing on the same ledge. This image also has the added benefit of lines running of into the distance as well which adds some horizontal depth as well as the vertical depth.
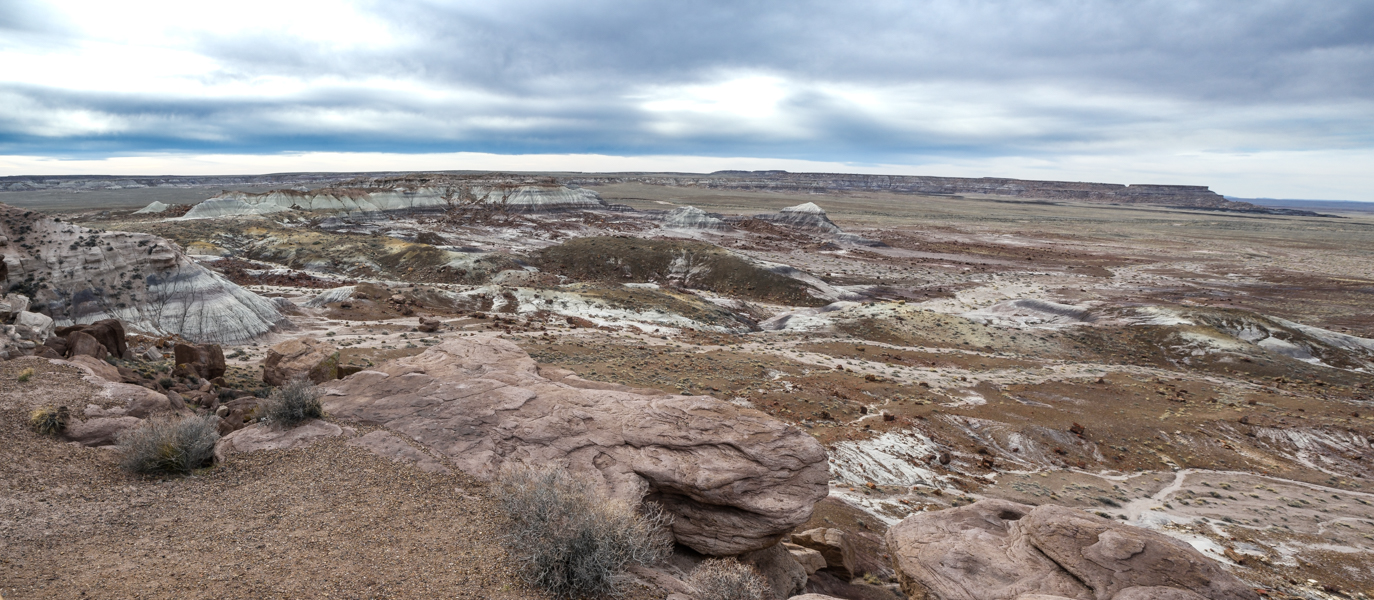
  This next image has all the lines running into the distance so you only really get horizontal depth. This image feels like the landscape goes on forever in the distance but it is hard to tell how high the landscape drops off. This two images are taken from the same place but looking different directions. The second is looking 90 degrees to the right of the first picture. The last image I am going to show you is the shoot I took is from Tiponi Point in the Painted Desert (part of the same national park).
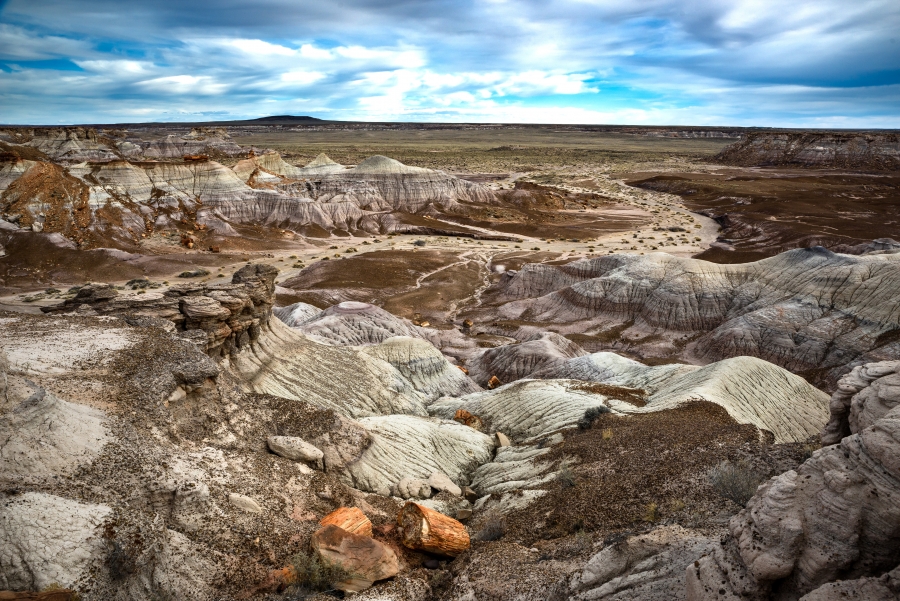
  In this example it was the contrast of tones and the shapes that garbed my attention. The sun was getting lower in the sky which helps add texture to all the hills that get side light as you can see in the ones in the background and camera right. I used a wide angle lens which adds depth by stretching lines and there are lines leading off into the background which adds depth. This one also has some lines running vertically in the image to add vertical depth as well. The sky was just starting to get color as we were about an hour from sunset however the ranger kicked me out after this image because the park had closed so I couldn’t get the shot I wanted. I did use my CPL filter to add contrast in the sky and it also helped to saturate the colors.
I hope you enjoyed my experience photographing the Petrified Forest and I hope it helps you plan you trip there. If you have any questions or wish to order a print feel free to contact me.