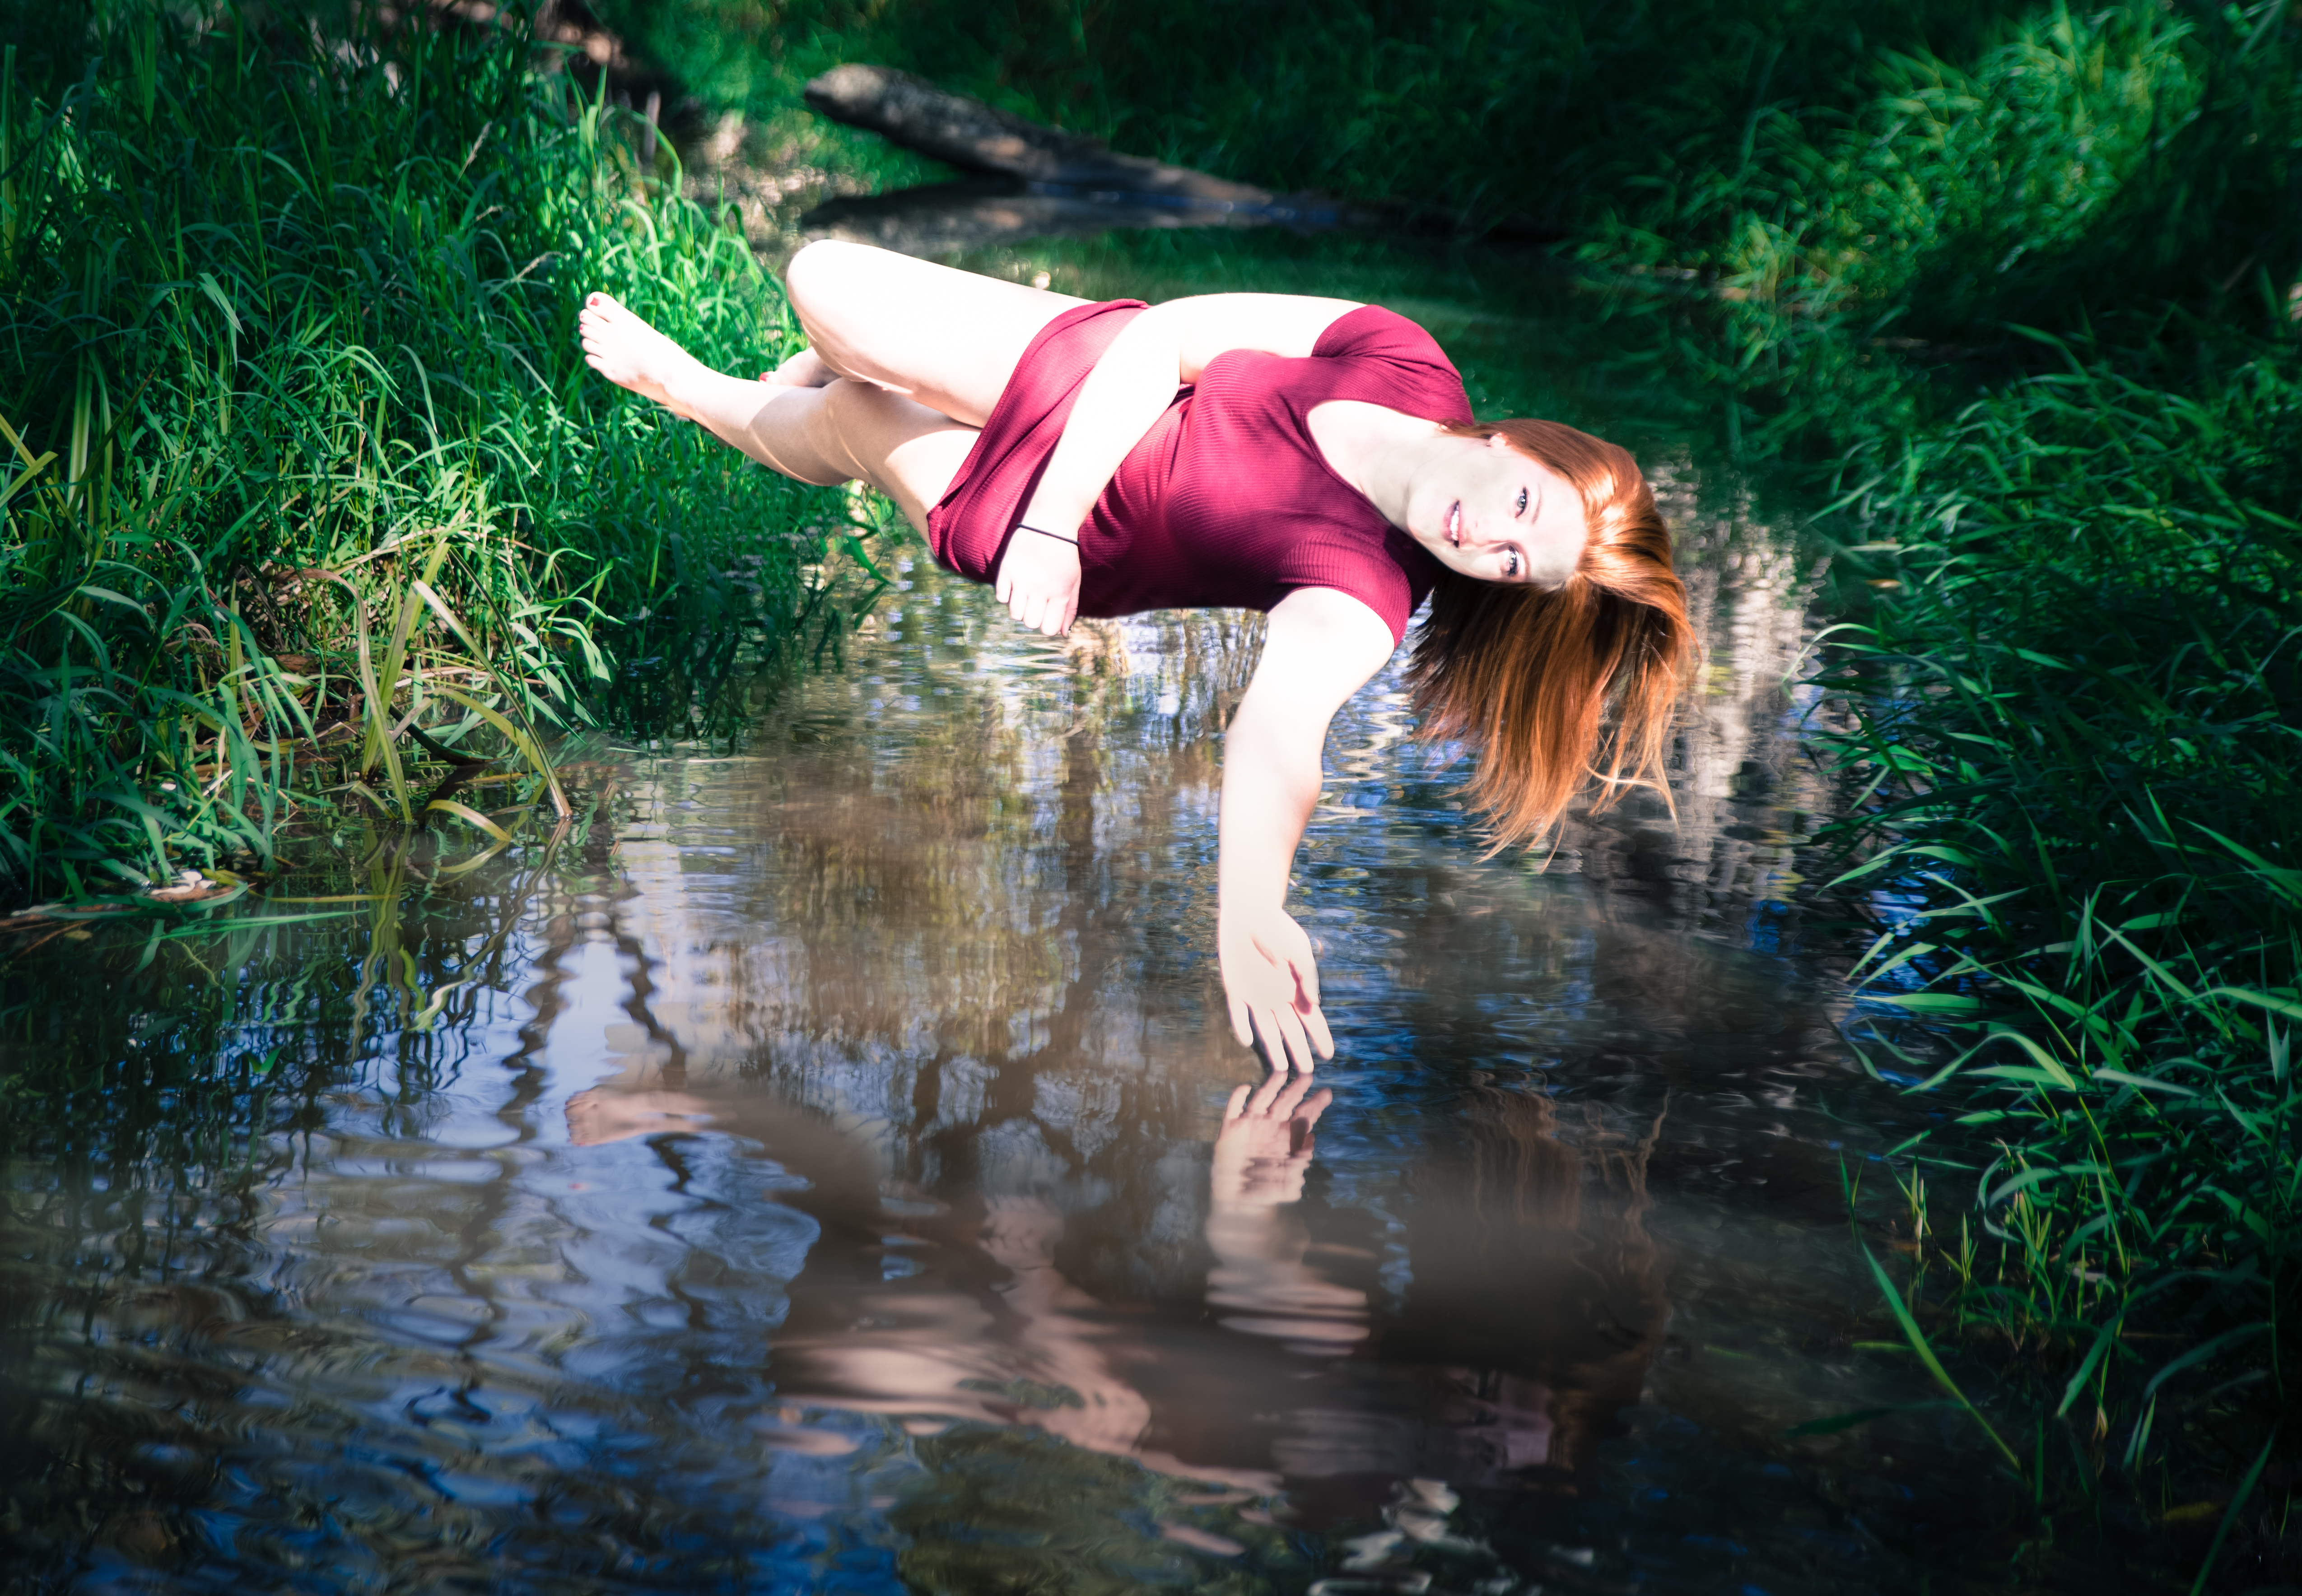
 What I learned from my first levitation shoot.
I saw someone posting levitation photos a while back and thought it would be fun to try. I have been hesitant to try it because it obviously involves Photoshop and Photoshop is intimidating to me. I almost never use Photoshop because I am not very good at it but there are time when it is a must like this. So I ignored my hesitations and decided it was worth trying.
The overall idea is easy and only requires two images and three stops:
Step One – Setup your scene. In case this case I setup stools and laid on them to both show my model the pose I wanted but mostly to make sure they wouldn’t fall over on her when she laid on them. If she fell in the whole shoot would be over. 😊 The trick to the pose is to make sure the stools don’t bunch up or stretch the skin of the model. Otherwise it will look like she is laying on something even when you remove the stools. Optionally you can take more shots for each subject you want to float. Just use only one big object per shot or a few small objects per shot. It will make Photoshopping easier later.
Step Two – Shoot the scene as it is. Now that you have your shot of your subject it’s time to take the second shot. This one you need to make sure you don’t change your focuse, point of view, exposure, or lighting. If your lighting changes between the shots the shadows will make it look fake in the end. The same goes with the other things. Changing focus exposure point of view will also make it hard to merge the two shots together or look fake in the end. In this shot it will be just of the scene with out the stools and model and other floating subjects.
Step Three – Now its Photoshop time. Create a layer for each photo with the shot of just the scene being at the bottom. Use the layer mask to remove the stools and supports for the subjects by making that part of the photo transparent. This will make the lower layer show through. The nice thing about a layer masks is you can easily remove any part you accidentally removed by swapping the color to brush back the top layer.
That’s it. Merge the two images into one and you are done.