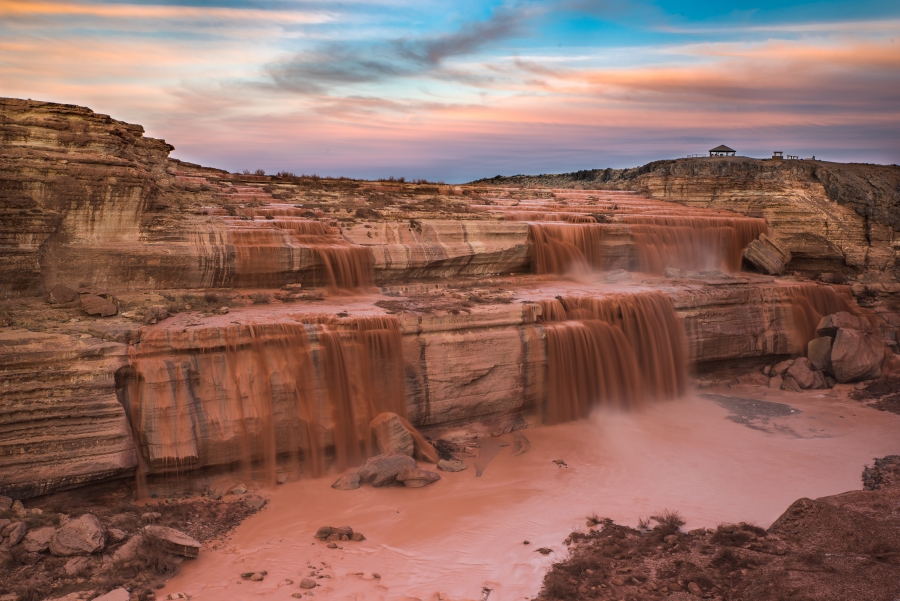
 Shooting waterfalls all have something in common however each waterfall requires something a little different to get the shot right. This waterfall required two trips to get right. The first time I went it wasn’t flowing so the second time I make sure it was flowing before I went. What makes this waterfall unique is the chocolate milk color of the water. For the shot I wanted to bring that out and shot the with the smooth look you get when you poor chocolate milk. I also wanted to contrast that smooth texture with the rougher texture of the rocks. This required a long exposure 30+ seconds. No problem I have a filter for that. I can attached my Lee 6 stop or 10 stop ND filter to slow down the shutter. The problem was when I arrived there was a strong shadow halfway down the waterfall. This shadow was created from the ledge I sat on to take the picture because the sun was setting directly behind me. I didn’t like the shadow cutting through half of my photo. I could have used my hard edge filter and place that directly on the edge of the shadow however the shadow was not a straight line which would leave weird shapes of shadow where the filter didn’t fill in. I took shots knowing they wouldn’t be the one I wanted but I used them to practice when to get the composition and look I wanted. Then all I had to do was wait until the sun dipped low enough to move the shadow all the way up above the waterfall bank. The problem this caused was that now the whole waterfall is in deep shadow but the sky was 6 stops brighter which means if I wanted a long exposure the sky would be blown out and white and I wouldn’t’ get the colors in the sky from the sunset. To compensate for the difference I used my Lee 6 stop soft edge GND filter. This darkened the sky by 6 stops and fazed out over the waterfall evening out the exposure between the sky and the waterfall. This allowed me to get the 30 second exposure as well as capture the colors in the clouds.
 The next version of the waterfall I wanted was some star trails. For this shot I would have to wait until night fall when the sky darkens completely. I choose the right time of the moon cycle as it was just a sliver in the sky. Just enough for me to see so I didn’t walk off the cliff but not too much that it make the sky too bright to see stars. Because the sky is dark I didn’t need a filter. Actually a filter would have also filtered out the faint light from the stars. To capture as many stars I used a wide open aperture 2.8. The waterfall was about 50 yards away and I was zoomed in to about 70mm so doing the math I knew that should keep everything from 27 yards to 239 yards in focus which could keep the whole waterfall fairly in focus. Focusing in the dark can be difficult to impossible so I had to focus manually. My flash light wasn’t bright enough to light the waterfall for auto focus to work so I just set me camera to focus at infinity. For the shutter speed I know from previous night shooting I could get at least a 30 minute exposure which would get good star movement as well. So I used my remote to open the aperture and set my stop watch. I chose to get this shot is one image but the down side is it adds some noise as the sensor heats up over 30 minutes. There is another option for star trails that that can limit the sensor heat. For the second option you take 10 second exposures over the 30 minutes or more and then stack them using software. The problem with this option is it requires more post editing and the canyon was so dark that I would have had to increase my ISO to over 10,000 to get a 10 second exposure even at the 2.8 f-stop. This added noise anyway however when stacking the shot the ISO noise is easier to remove then sensor heat noise. I choose to go for the first option because it was a cold night and I don’t often spend that much time in post editing. I like the challenge of getting the shot in camera when possible rather then spending my time in Photoshop. Hope you found this tutorial helpful. If you have an questions feel free to drop me an email.


