How to repair your broken umbrella shaft for only a few dollars.
A shout-out to my Dad who suggested using an arrow!
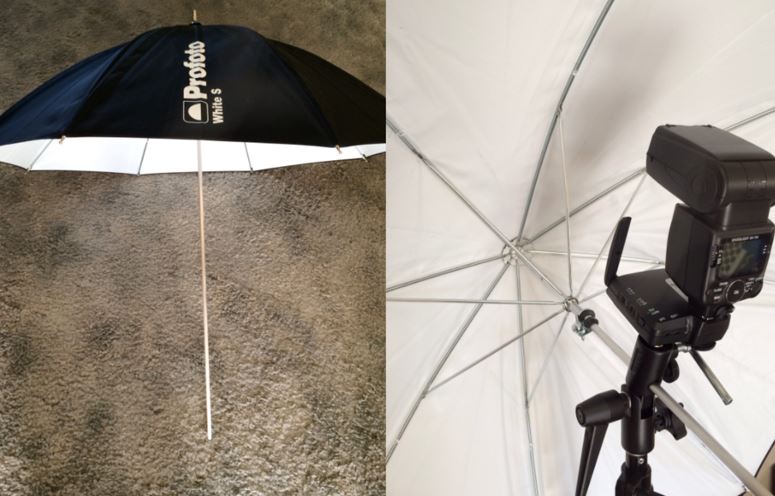
I was out on a shoot when a gust of wind blew over my tripod, umbrella, and flash. Luckily the only thing that broke was my umbrella. Unfortunately my umbrella was a Profoto umbrella they are very proud of their equipment. It was going to cost about $110 for a new one so I decided to see if I could fix the broken one. The only thing that broke was the shaft but it broke at its weakest spot which happens to be where it clips into place. I found a way to fix it with some cheap hardware and an arrow for only a couple of bucks. I knew I there was no way I am the only one with this problem so I decided to document my work so others could benefit from my experience.
Here is how you do it:
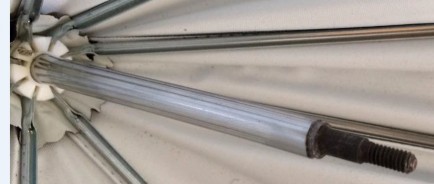
First in your umbrella cut off the broken edge near the base and clean up the edges so they are smooth. Next go down to your local archery shop and get yourself an aluminum target arrow, one where the tip screws off (which I think is just about all of them)
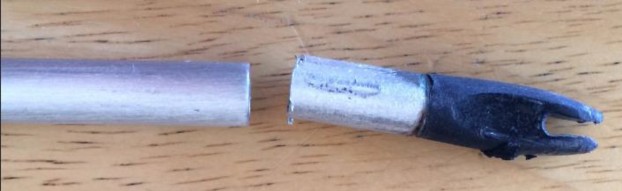
 Now unscrew the broadhead (arrow tip) from the arrow shaft. Notice the threads on the broadhead you need to keeps those so don’t damage them. Grind down the broadhead (unthreaded side) so that it fits inside the umbrella shaft. Once you have it thin enough to fit inside the remaining umbrella shaft use some epoxy or JB weld to permanently keep it there.
Let the epoxy set for a while so it firms up. While you are waiting take your arrow shaft out to the shed and get your sander. Pull off the fletchings (feathers) and sand down the paint to the aluminum so it is nice and shiny. I started off with 80 grit and then 150 grit sandpaper.
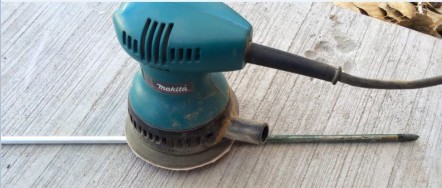
Next cut off the nock (end of arrow on the notch side). Round down the cut and smooth it so that it doesn’t have any burrs or sharp spots. I used a Dremel for cutting it and then also used the Dremel to to grind down and smooth the edges.
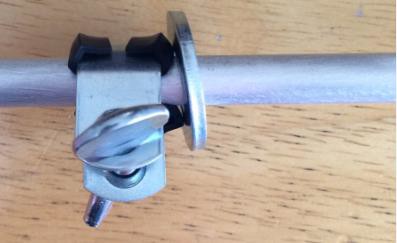
Next find some higher grit sandpaper like 200 or so. Use it to smooth down the whole shaft and get rid of any scratches the sander left. This will also make if feel much smoother. Clean off the shaft and go to the hardware store. You have several options here. Find something that will fit over the shaft and clamp down. Here is what I used and it cost $2. I used a washer originally but I don’t think there really is a need for it.
Back to your umbrella, the epoxy should be hardened and usable by now. Take the umbrella shaft with your clamping mechanism of choice and thread it through the umbrella slider and screw the threaded side of the shaft onto the broadhead. Push the shaft through the umbrella until the umbrella is open all the way.
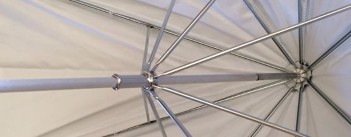
Side your clamping mechanism to hold your umbrella open and you are done. Now you can either leave the clamping mechanism in place and just screw and unscrew the shaft or loosen your clamp and slide it down to take down your umbrella.